AE86 Origins Pt. 2 - Cut, Weld, Repeat.
Picking up where I left off in the previous post, I'd decided to strip the car down to take care of all the issues that needed sorting, while also making a host of changes in the hopes of improving the performance, feel, and looks of the car. This one of the last photos I have of the car in this guise. One of the main catalysts to this decision was that I now had for the first time, access to a shed to protect me and the car from the Irish weather.

Once I started to get underneath the over fenders and side skirts it wasn't pretty, while it wasn't a total surprise, when its right in front of you that doesn't make it easier to swallow.
You can see the significant amount of filler that was used previously when the car was painted, and where previous rust had just been plated over at the bottom of the arch instead of treated properly.
This is what had been done to the arches, the presumably rusty edges were cut out and then just spot welded together, with a load of seam sealer thrown on top. This allowed basically any water that was thrown up in the wheel arch to spread throughout the sills, arches, and pockets and settle in the seams. Seeing this standard of work was pretty disappointing, because with just a small bit more effort and care, I'm sure lots of the rust that I had to cut out could have been avoided.
Anyone who is familiar with ae86s know that the areas that I've shown and will show are fairly susceptible to rot. Thankfully the floor and underside of my chassis required little to no work, which was at least a welcome consolation.
The manual steering rack on top compared to the power steering system below. The weight saving alone in removing the power steering rack and all its ancillaries is significant.
The refreshed rack in its new home in the freshly painted front crossmember.
This sort of work can be tedious at times, but when you've got a stack of fresh parts to bolt back into the shell it's all worth it.
 |  |
Nobody really sees this stuff. But still.
Freshly painted knuckles, rear end arms, and cusco adjustable panhard rod.
This was the only picture I could find of the Prothane bushings being installed, excuse the potato picture quality. Every rubber bushing on the car was replaced with Prothane polyurethane bushings.
The inner and outer arch skinner welded together here, this is how the job should have been done originally, preventing any moisture getting in. This signified one of the last bit of welding the shell got. I'm pretty light on progress pictures of the welding, a lot of what I showed above was from pretty early doors. I soon figure out that when you're worrying about getting pictures of everything, you're slowing yourself down.
With all the welding completed on the shell, it was time to roll the car out for some fresh air. The underside was scrubbed clean and degreased, before being treated with zinc phosphate. While most of the underside coating was still intact from the factory I wanted to make every effort to keep it solid and rust free for at least another few years.
Getting the sniff test from the branch manager. The underside was then painted and then sprayed with dinitrol under sealer.
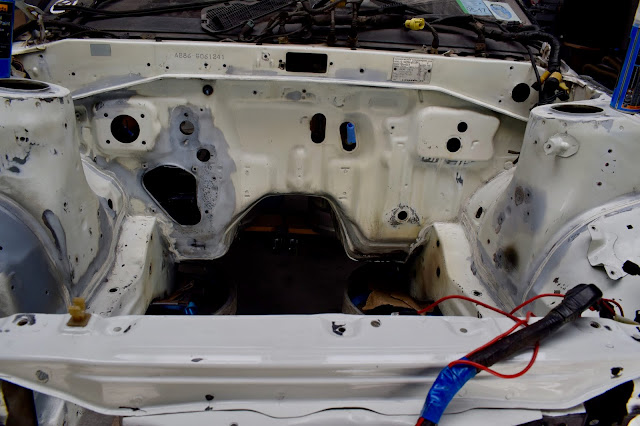
At the same time I gave the engine bay a thorough clean and rub down with some scotchbrite. I also took this oppurtunity to strip out all the old seam sealer. Being 30 odd years old it hard started to crack in places, so stripped it all off and laid some fresh sealer down before it got a fresh coat of paint.
Turned out pretty sweet I think.
The last piece of the puzzle, and honestly on the most important, bodywork wise, was the rear arches. So about this time I started to play around with some templates. I had a really clear image of how I wanted to arches to look and also how I wanted the wheels to sit inside them. I do remember feeling pretty amazing at this point, because if I blurred my eyes it almost looked like a car again. Assembly, the good stuff, up next.


Comments
Post a Comment